Hello team, today we’re diving into Hostinger VPS and exploring how to handle an unmanaged VPS Server for setting up and overseeing WordPress, even if you lack Server Admin expertise. With Xcloud.Host, you’ll have nearly all the necessary tools to independently operate and sustain the Server, allowing you to establish a WordPress Website with just a few clicks.
Why Choosing Hostinger VPS and How Good it is
My experience in hosting websites has taken me through various platforms, starting with Hostinger’s Shared hosting, then moving to Cloudways, followed by InterServer VPS, and currently, Hostinger VPS Hosting managed by xCloud.Host. Prior to transitioning to Hostinger VPS, I was using Cloudways.
Cloudways offers an affordable entry-level server solution, allowing you to purchase a Digital Ocean server with 1GB RAM for about $11 to $12 just add around $5 to the actual cost of a DigitalOcean 1GB server. This is quite economical, wouldn’t you agree? They provide numerous features such as server management, backup handling, and excellent customer support, making their service worth the price.
It’s essential to understand that Cloudways is not a traditional hosting company. Instead, they specialize in managing servers by taking full control of them. They have partnerships with various providers such as DigitalOcean, Vultr, Linode, Amazon AWS, and Google Cloud Server Providers. This allows clients to select the desired server size from these cloud providers. Cloudways then manages these servers, simplifying the process of installing applications like WordPress, Laravel, or Magento for you.
Getting Started with Hostinger VPS Dashboard
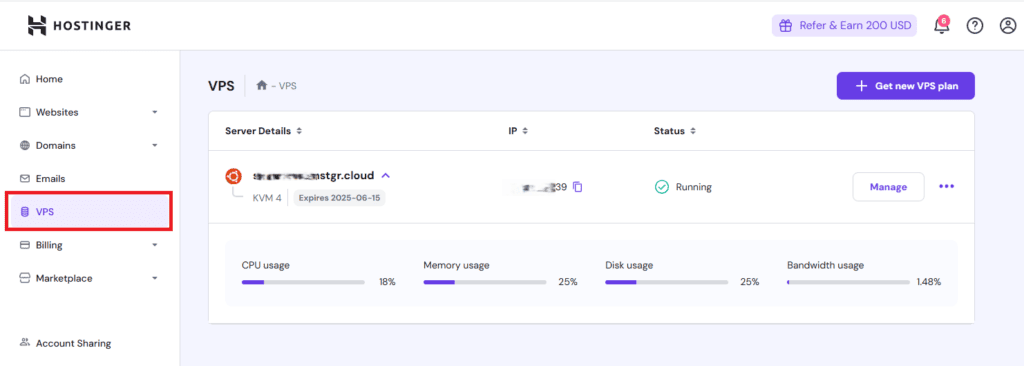
Once you purchased the VPS Server from Hostinger. You will find VPS section included in the Left side of the Section. Once you get into that, you will find your Server details such as Server Name, IP Address and Manage Button to access more Server Info and Features viz your Server Overview, Security & Backup.
Below that you will see the User friendly Server Stats showcasing the CPU Usage, Memory Usage, Disk Usage & Bandwidth Usage
Once you click Manage Button you get into more Server Level Management Dashboard.
Hostinger VPS Server Overview
In the Overview Section, details about VPS, SSH Access, and VPS Plans are provided. Following this, a visually appealing graphical chart presents the Server Usage Statistics.
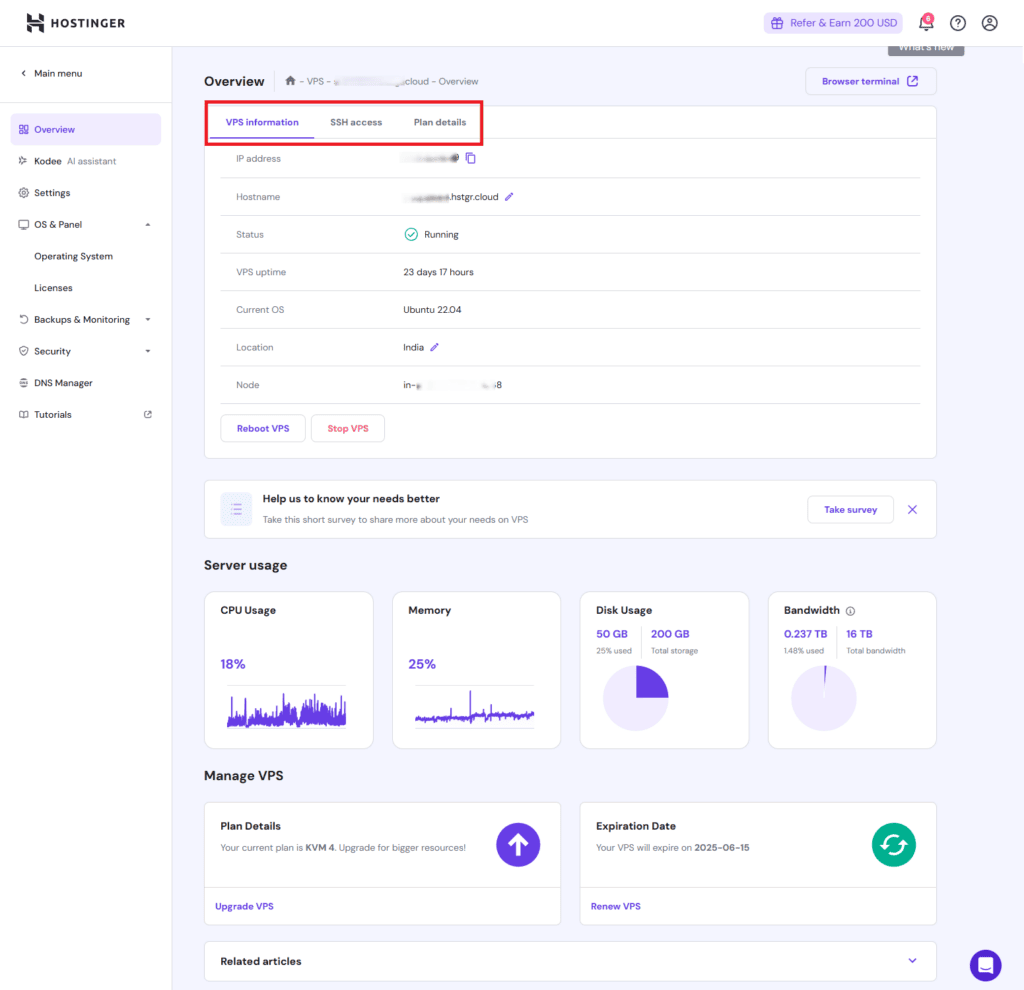
Below, the Manage VPS section allows you to upgrade your VPS plan to higher resources at any time.
If your current VPS plan is nearing its expiration, you can extend it for another year under the Renew VPS Section.
Hostinger VPS Monitoring & Backup
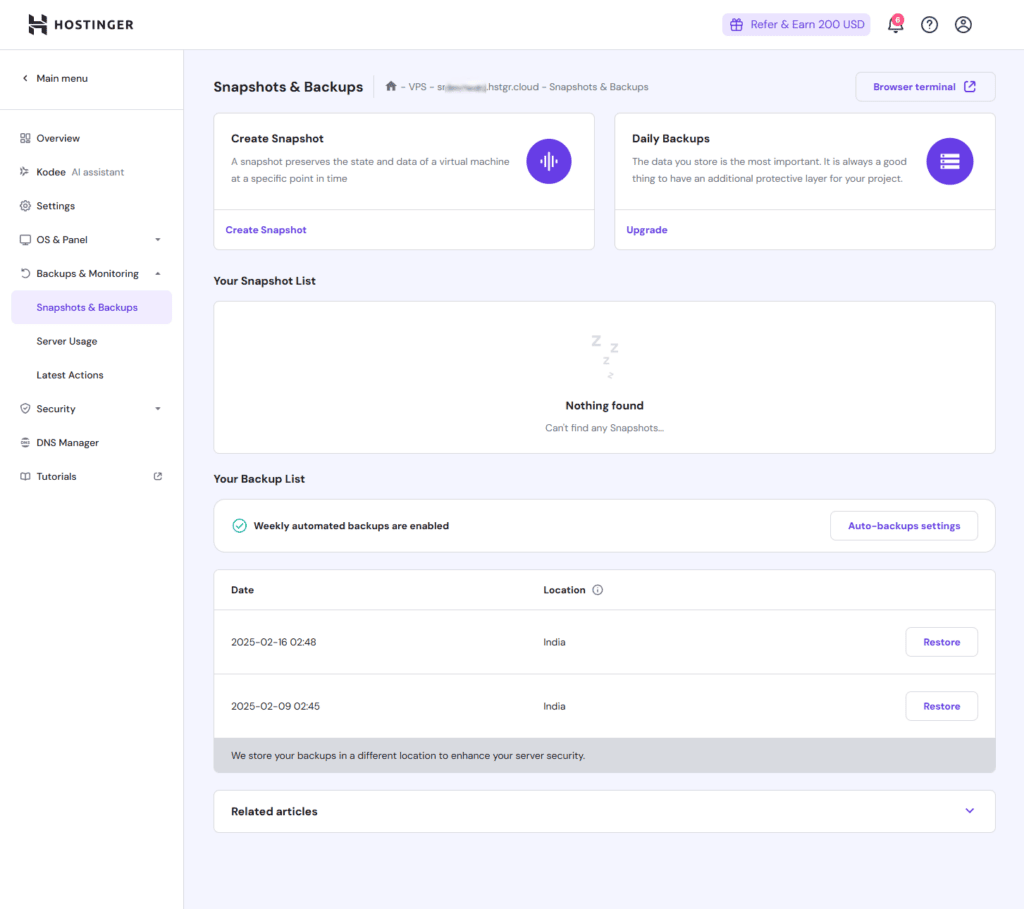
Snapshots & Backups
In this section, you have the option to create snapshots of your VPS Server. By default, weekly backups are activated. However, if you prefer daily backups, there is an additional fee. Personally, I don’t find the need for that. Weekly backups suffice for my needs. Additionally, I use the Updraft Plus Backup plugin to back up my WordPress site to Google Drive twice a week to safeguard my work and website data.
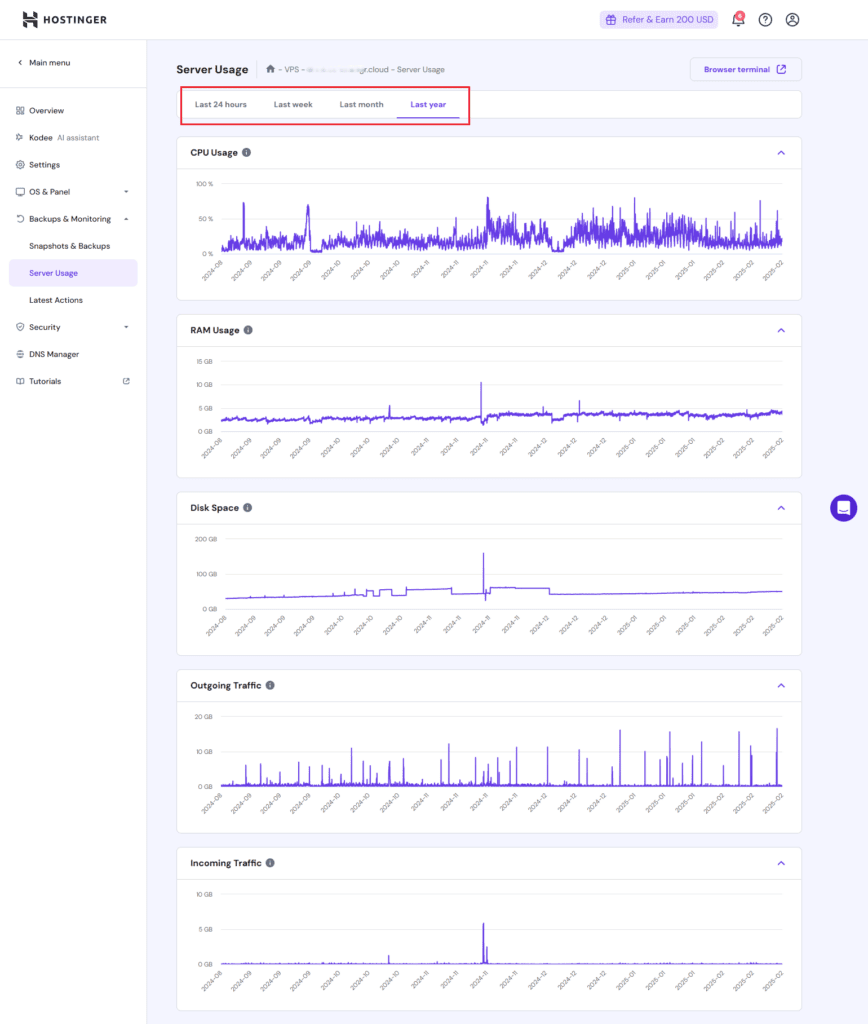
Server Usage
In this section, you can view your server usage statistics for the past 24 hours, the previous week, month, or year. The screenshot below illustrates my VPS annual statistics, showing that resource usage seldom exceeds 50% and only does so for a few hours.
Hostinger VPS Security
Hostinger provides Server Level Security in an Instant. All you need is to click the Monarx Malware Scanner for your VPS tab to install this Software for free to protect your VPS from Malicious files. Installation File size is around 15 Mb and it takes some time to install during which your Server is not managable.
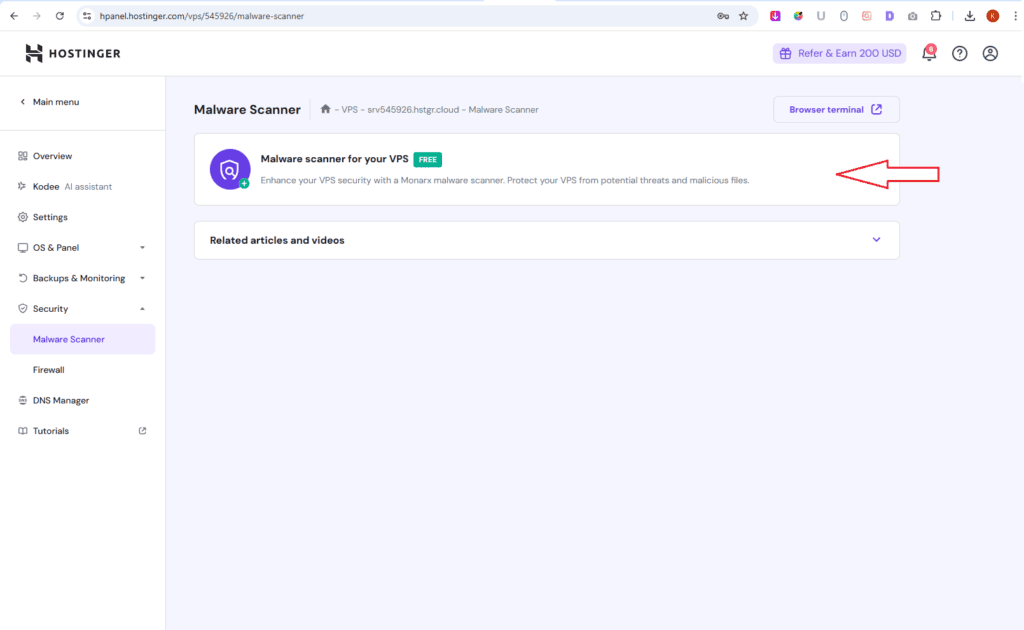
We don’t need to install it. Because we will connecting the Hostinger VPS Server with xCloud.Host – A Self Managed WordPress Control Panel which will do that work on its own.
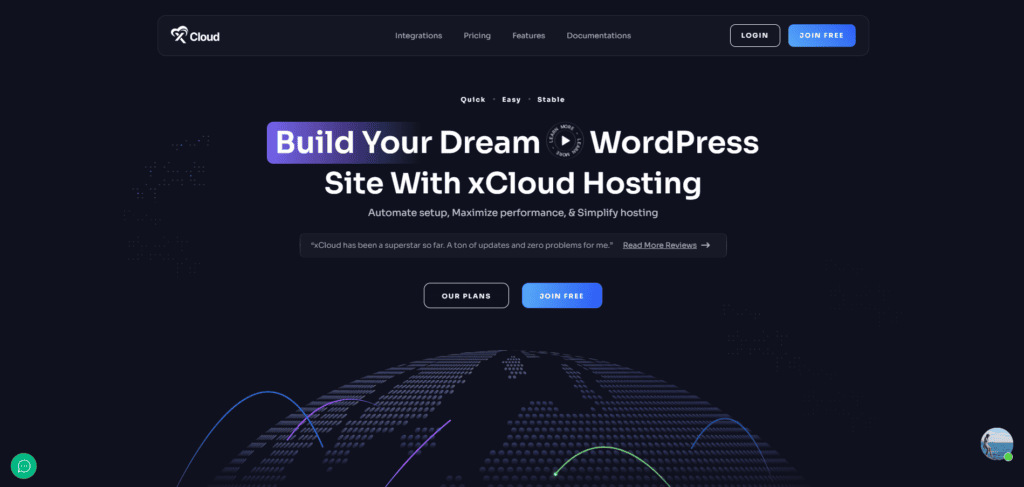
Xcloud.host – Self Managed Cloud Hosting Control Panel
xCloud.host is almost same as Cloudways in terms of how it functions but xCloud is a server management software which is catered exclusively for WordPress application only unlike Cloudways.
XCloud serves as a WordPress management hub where you either link your existing server or purchase one of their servers to quickly set up WordPress, similar to Cloudways. xCloud efficiently installs necessary software and scripts to operate and oversee your server and WordPress site within minutes. I have connected my Hostinger VPS Server, acquired from Hostinger, to run all seven of my websites without experiencing any downtime so far.
Additionally, XCloud offers Managed Servers through a partnership with Vultr Cloud Server Provider, delivering competitive pricing that allows you to select a plan without the need to purchase the server separately from other providers.
Why XCloud is Better than Cloudways?
Currently, xCloud offers a complimentary plan that allows users to connect their own server and host up to ten websites without any cost. This is particularly advantageous for solo entrepreneurs like myself. When it comes to pricing, xCloud offers more attractive options.
On the other hand, opting for a basic 1 GB RAM server with Cloudways may seem economically viable due to the comprehensive services provided, such as automated backups, robust server security, and exceptional customer support. However, as you scale up to higher resource servers, such as those with 4 GB RAM or high-frequency capabilities, the costs can become significantly high compared to the straightforward pricing of Digital Ocean for equivalent specifications.
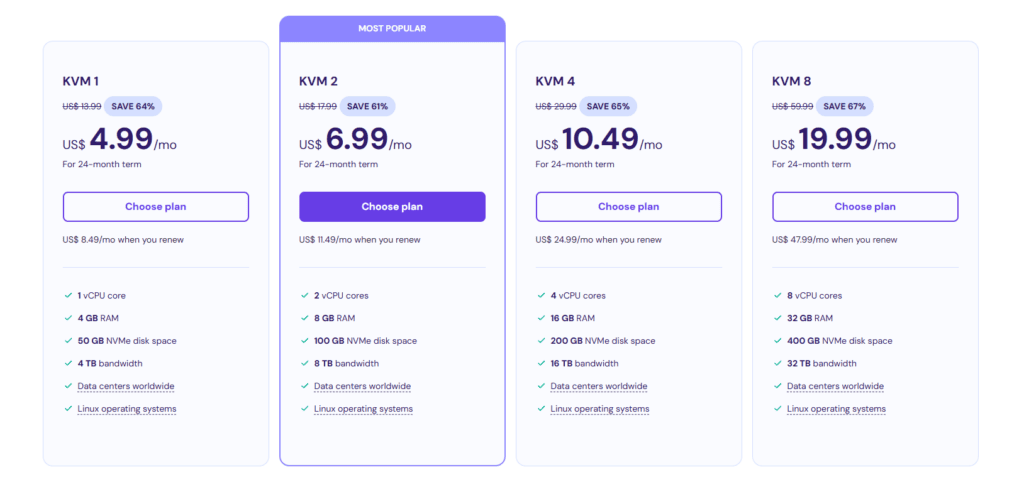
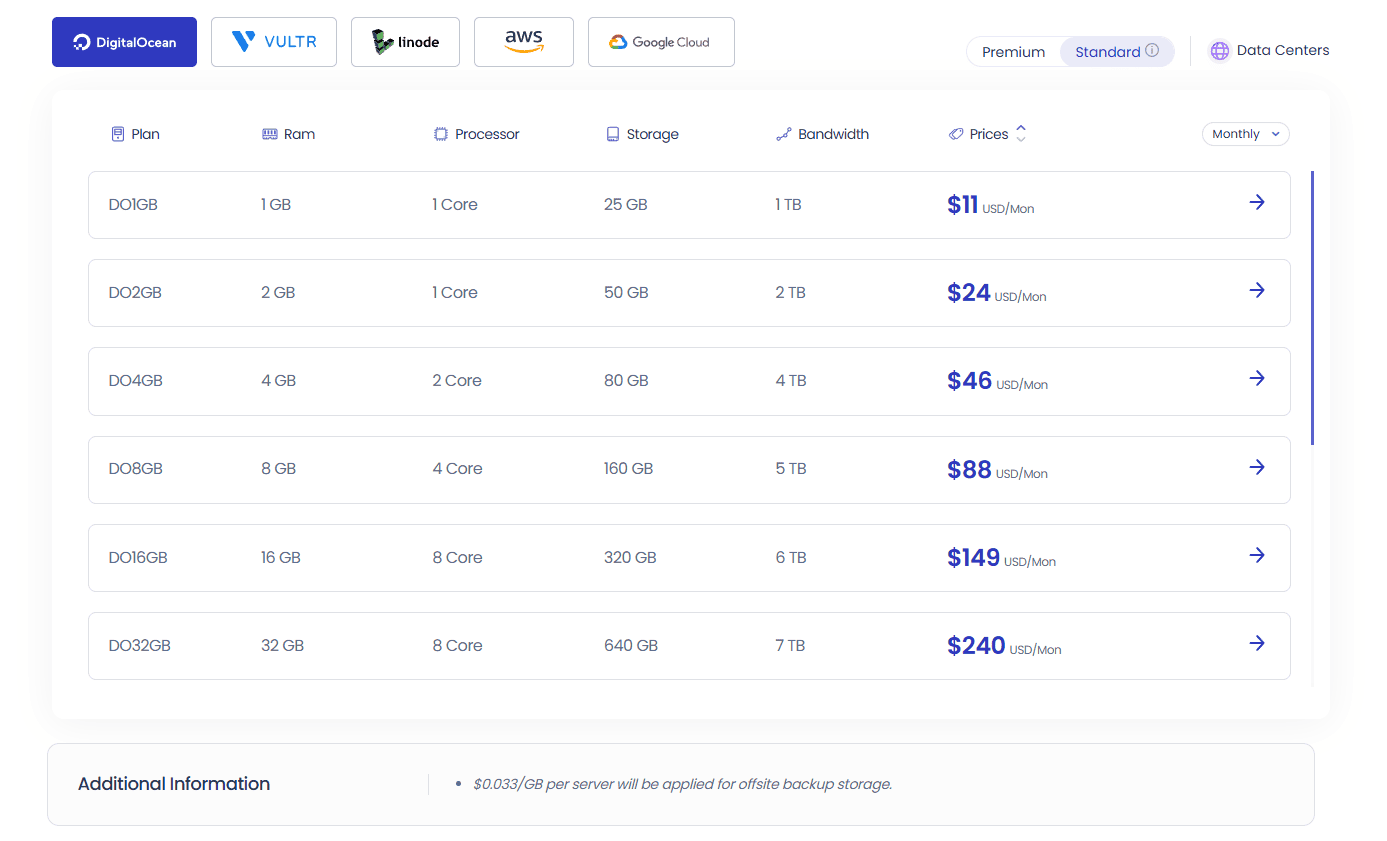
I am using Hostinger’s KVM 4 Plan, which offers 16GB RAM, a 4GB vCPU core, and a 200GB NVMe SSD, all powered by AMD EPYC, for just $10.49 per month. In comparison, a similar plan on Cloudways, the DO 8GB plan, costs me $88.
Transitioning from Cloudways to xCloud with Hostinger VPS Server could potentially save me $70 monthly, which is quite appealing. Nonetheless, it’s important to note that XCloud operates as a self-managed WordPress control panel, lacking the premium customer support and automatic backup features provided by Cloudways. However, users can integrate object storage within Xcloud settings for seamless backup management. Moreover, xCloud.Host boasts a range of beneficial features that surpass those offered by Cloudways, especially for WordPress enthusiasts.
Benefits of Xcloud over Cloudways
- They provide Tiny File Manager which is not available in Cloudways
- You can have a Root Access to test and try out technical stuffs on your Server with XCLoud
- Magic login makes you to login your wordpress admin dashboard in one click
- You can update and activate and deactivate themes and plugins from within xcloud dashboard
- Comes with a pre-installed FluentSMTP and xcloud also provides free 100 email per month
For Backup, Xcloud has built-in connection to external storage like Amazon S3, Vultr Object Storage, Google Cloud Storage to take backups. In this case your backup got saved in Different Storage servers and you have full control over it but on Cloudways, they can automatically backup your server and you do not know where it is you don’t have access into it and have no control over it.
You know one thing, Hostinger offers Server-level Weekly Backup ensuring automated backup needs are also got covered with this. You can create snapshot as well with Hostinger for further data protection.
Major downside of xcloud over Cloudways
In my experience, xCloud excels in terms of functionality and features when compared to Cloudways. However, there is significant room for improvement in their customer support. I’ve faced situations where I had to wait several days, sometimes up to a week, for a response to resolve a server-level technical issue.
One such issue involved updating the Robots.txt file independently, which took nearly a week to address. At that time, users couldn’t update their Robots.txt files on their own—a significant shortcoming that needed urgent attention. Fortunately, xCloud addressed this by introducing a Robots.txt customization feature within the Application Management Settings of their xCloud panel during their next software update.
Although xCloud may not be as large as Cloudways, the platform, launched in 2024, matured impressively within just one year. The tech team has been outstanding, rapidly addressing issues and facilitating xCloud’s growth at an accelerated pace. Within a year, xCloud has positioned itself to be compared with Cloudways, showcasing remarkable progress since its inception in 2024.
Connect Hostinger VPS with xCloud
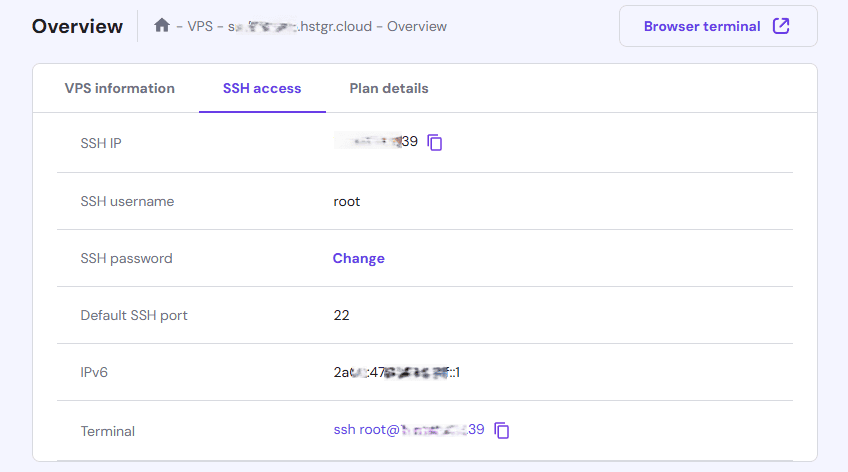
You will find Hostinger VPS Server SSH Access details from VPS ➜ Main Menu ➜ Overview ➜ SSH access.
SSH Username, SSH Passsword, Port Number, IP Address are required to fill in on xCloud “Connect your Existing Server” window
You can connect an existing Hostinger VPS Server on xcloud just by going to xCloud Dashboard and click New Server which popout the window like the below.
Fill in all the fields with right information without any error so that your Server will connect flawlessly without fail.
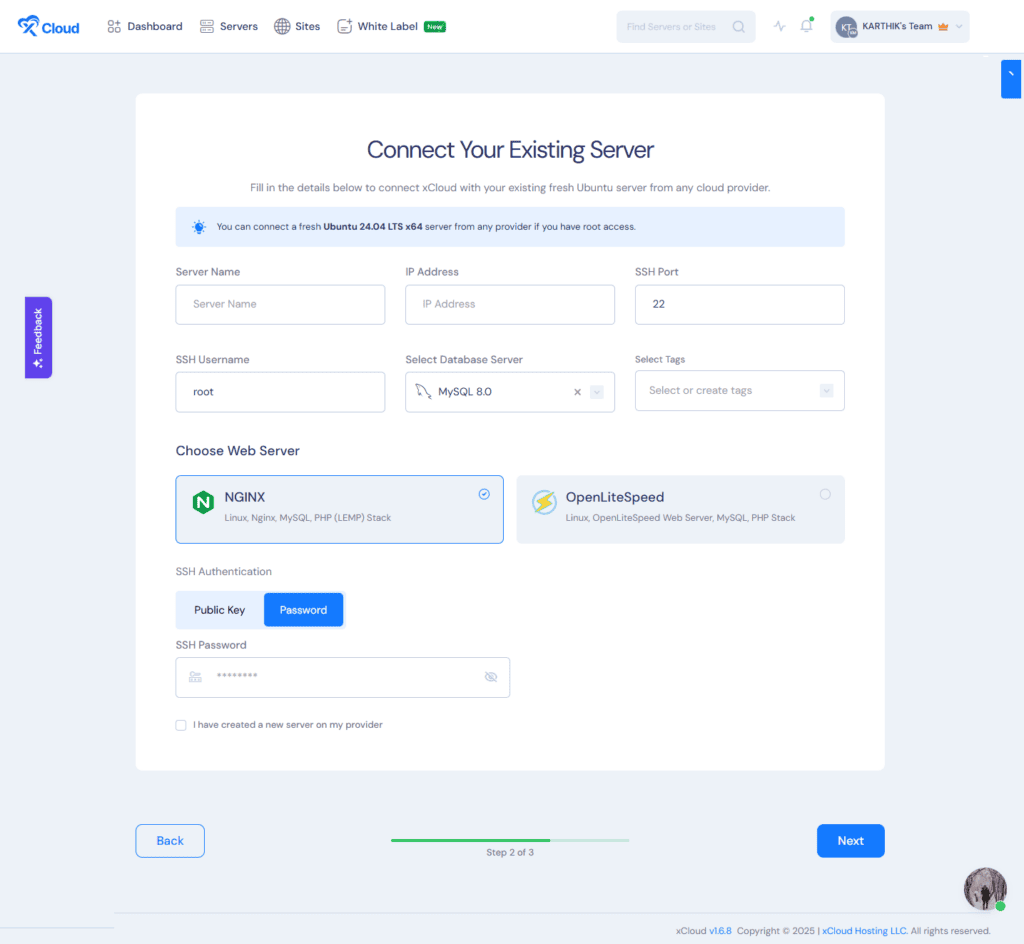
Note: Make sure to toggle the SSH Authentication to Password because we already have Hostinger VPS ssh password.
Once your Hosting VPS connected to xCloud, you can create upto 10 websites for Free. xCloud.Host has created the Step by Step guide to create a Site. So, I don’t wantto reinvent the wheel. Please follow the Steps to create a Website
Migrate your Websites from Cloudways to xCloud
Are you still in doubt, If using Cloudways then it’s time to switch your Website to xCloud.Host now. No need to worry about the Website Migration.
xCloud has made a in-built Migration tool which has done the job seamlessly and successgully migrate the website no matter how big your Website is. Below is the Video tutorial on how to migrate your Website from any Hosting to xCloud